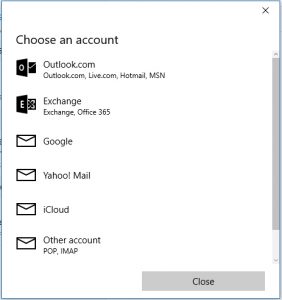
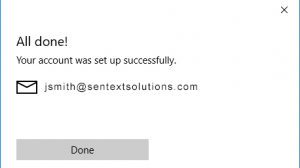
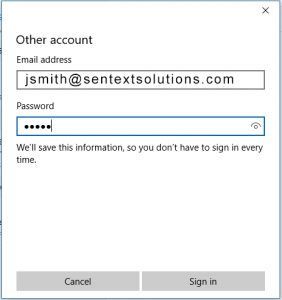
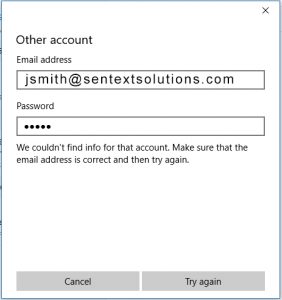
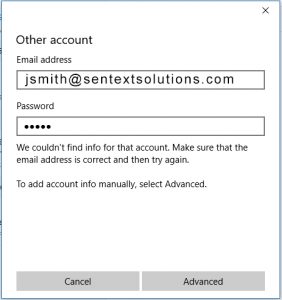
E-Mail Set-Up
Server Settings
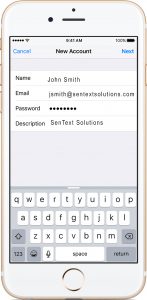
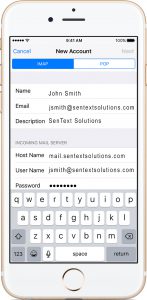
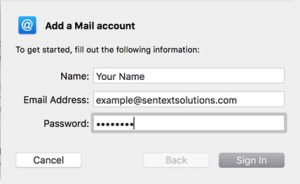
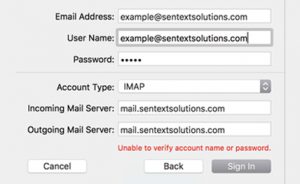
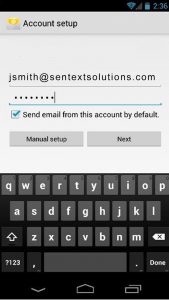
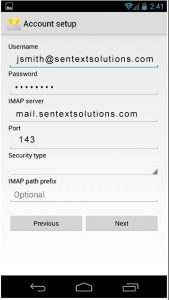
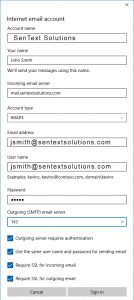
Username: This is your full SenText email address.
Password: The password that was issued to you.
Incoming Server: mail.sentextsolutions.com
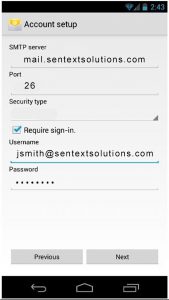
Outgoing Server: mail.sentextsolutions.com
IMAP Port: 143
POP3 Port: 110
SMTP Port: 26
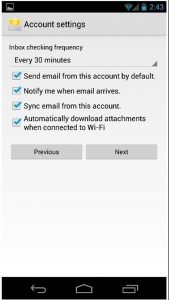
Authentication is required for IMAP, POP3, and SMTP.
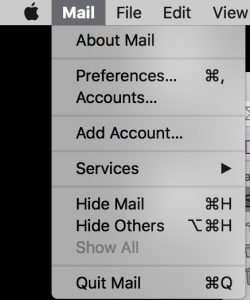
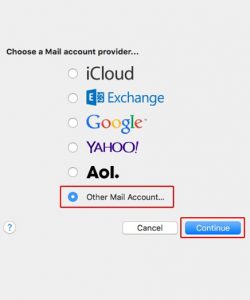
Click the plus below for specific device setup.
Add an E-Mail Signature

Hit this icon and it should create a dropdown of choices. But since you haven't made a signature yet it should only say "Signatures" Click that.

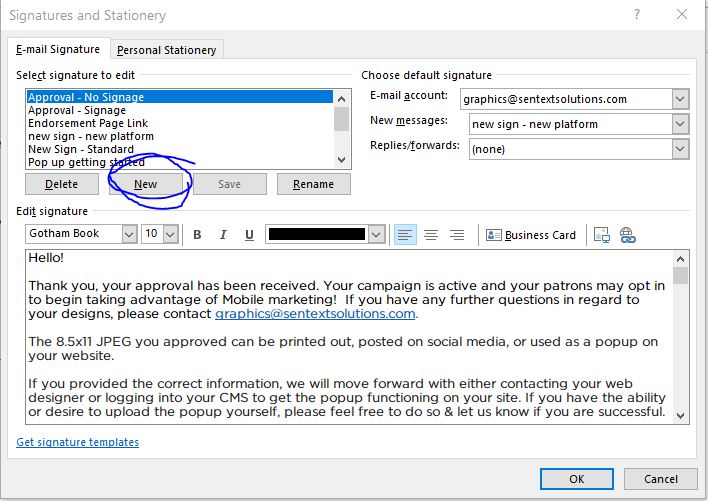
Hit New and write (Name / Company Position / SenText / p: Phone number / w: www.sentextsolutions.com / e: Email)
You can also Copy and paste someone else's Signature from a email that you have receive from a Sentext employee (Graphics/Merchant support) and fill in your information. Make sure you grab the Sentext Logo and Orange line when Highlighting the Signature to Copy.
P.s. You will need to copy the signature before you open up the signature screen.


Go to Settings > Mail, Contacts, Calendars. Then tap Add Account.
Tap Other to add your account manually.
Enter your name, email address, password, and a description for your account. Tap Next. Mail will try to find the email settings and finish your account setup. If Mail finds your email settings, tap Done to complete your account setup. If Mail can’t find your email settings, you need to enter them manually. After you enter your email address and password, tap Next.
Choose IMAP or POP for your new account. If you aren’t sure which one to choose, contact your email provider. Enter the information for Incoming Mail Server and Outgoing Mail Server. Then tap Next. If you don’t have this information, try to look it up or contact your email provider.
Locate the Mail Application in your Applications Folder.
In the top left hand corner, drop down “Mail” and click on “Add Account”
Choose the “Other Mail Account” option and continue to next page.
Fill in your name, email address, and password. Click “Sign in.”
Replace “example@sentextsolutions.com” with your email address, fill in password, and fill in the remaining text fields as shown above. Click “Sign in.” At this time, you may have completed your email set up. If you see a popup window like the one below, please continue for more instruction.
Click “Show Certificate.”
Click on the arrow next to “Trust” and click on the “Always trust” option. You may have to enter your computer password at this time. Then, click “Continue” and your email setup is now complete.
Select Email from the main Android window or Applications drawer.
Enter your SenText email address and password.
Click Next to continue.
Click IMAP account for type of account.
Click Next.
Username: Enter your email address
Password: Enter your password.
IMAP server: mail.sentextsolutions.com
Port: 143
Click Next.
SMTP server: mail.sentextsolutions.com
Port: 26
Check Require sign-in.
Username: Enter your email address
Password: Enter your password.
Click Next.
Email checking frequency: Every 30 minutes (recommended).
Check Send email from this account by default and Notify me when email arrives.
Click Next.
Click Done.
Launch Outlook Mail and open the settings by clicking the gear icon in the lower left corner.
Select Manage Accounts.
Select Add Account
Choose “Other account POP, IMAP.
Enter in your username and password and click “Sign in”.
An error will appear, click “Try again” until the advanced option appears.
Click “Advanced”.
Enter the information as shown in the example and click “Sign in”.
When you see this box you will know that it was successful.